

Using my completed second ship I began to learn the process of UV unwrapping . This initially proved troublesome due to learning with a model that was higher poly than the demonstration model.
The best comparison I can use to explain UV unwrapping in easy terms would be figuring out how to wrap the most awkward Christmas present known to man or reverse engineer an elaborate garment back down to a tailors pattern. Both involve visualising how to wrap a 3D model with a flat object or how to take apart a 3D model to create a 2D object. Thankfully, I have some experience with a Japanese software package called Pepakura, which takes 3D objects and can convert them into flat papercraft projects. The thought process is very similar.
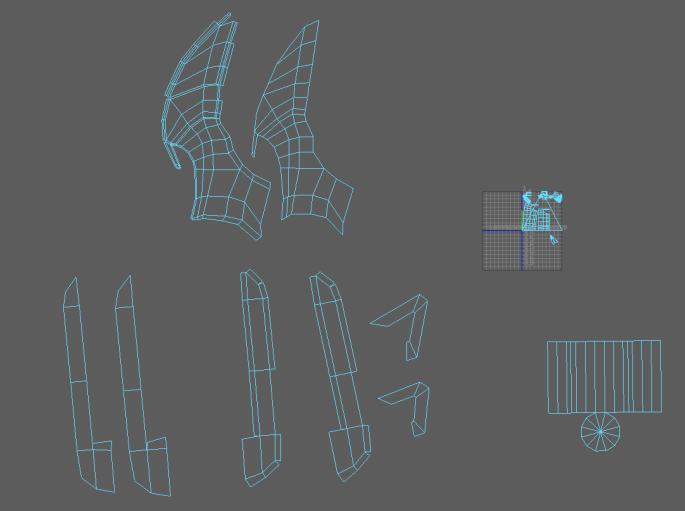
My main troubles were deciding on which parts of the model to unwrap. Due to the wing complexity, a lot of parts overlapped no matter how I attached them to the wing. In order to solve this I had to separate these parts completely which will add more work later on when painting, but overall should give a nicer finish with no texture stretching.
I will post an update when I have the completed UV.
UPDATE – 02/10/2016
Currently I’m having some difficulties unwrapping my Glaive. The complexity of the model has made me separate so many components due to faces overlapping and I currently have about fifty individual shells. I’m sure there must be a better approach so I’m going to seek some feedback before I continue and risk wasting hours on the project without results.
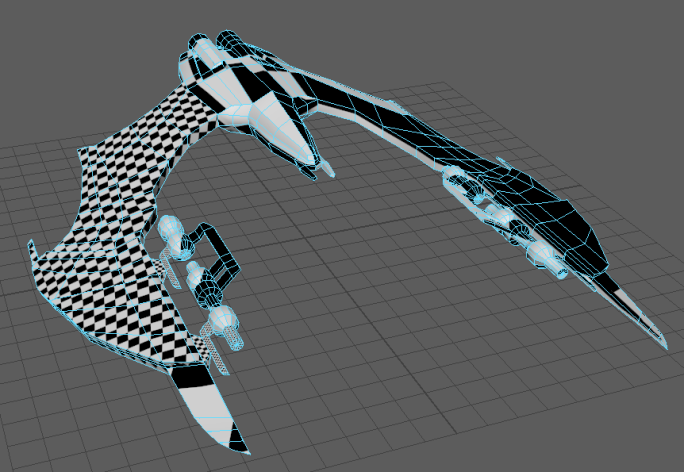
So, in the meantime, for practise and to have another model to use for the next class I have unwrapped my first ship.


This was much easier due to a lower polygon count. I did have some difficulties with a few rogue faces inside the mesh, some of them flipped so I’m not sure what caused that cluster of geometry errors, but I managed to remove them all.
Looking forward to painting this up and eventually finishing the other ship too!
